
What Worked and What Didn't - Bike
/This is the first of a few posts about what worked and what didn't. I'll do other posts on bikepacking bags, nutrition, navigation, etc. This one is focused on the bike. Enjoy!
The Bike
Frame: SIR 9 Niner
Groupset: SRAM XX1
Brakes: SRAM Guide RSC
Tires: WTB Nano 2.1 and XC 2.1 with Stans NoTubes sealant
Rims: SRAM Roam 50 (rear) and Stan's Arch EX (front)
Saddle: Selle Anatomica
Pedals: Shimano PD-M324 Dual Platform
Handlebar: TRUVATIV Stylo T40 Riser Bar
Aerobars: Profile Design T1+
I would consider myself fortunate for being able to start this trip with a brand new bike. (Blackburn partners with Niner, SRAM, and WTB. For those of you not familiar with the Blackburn Ranger Program, check it out here: https://www.blackburndesign.com/out-there ) The bike I got was the bike I got, but overall, I was very happy with it. Here’s the breakdown:
Frame
Niner SIR 9 (SIR = Steel Is Real)
What Worked: The Material (Reynolds 853 - STEEL IS REAL!)
What Didn't Work: The Geometry (small main triangle, especially on women's small frame)
Would use again.
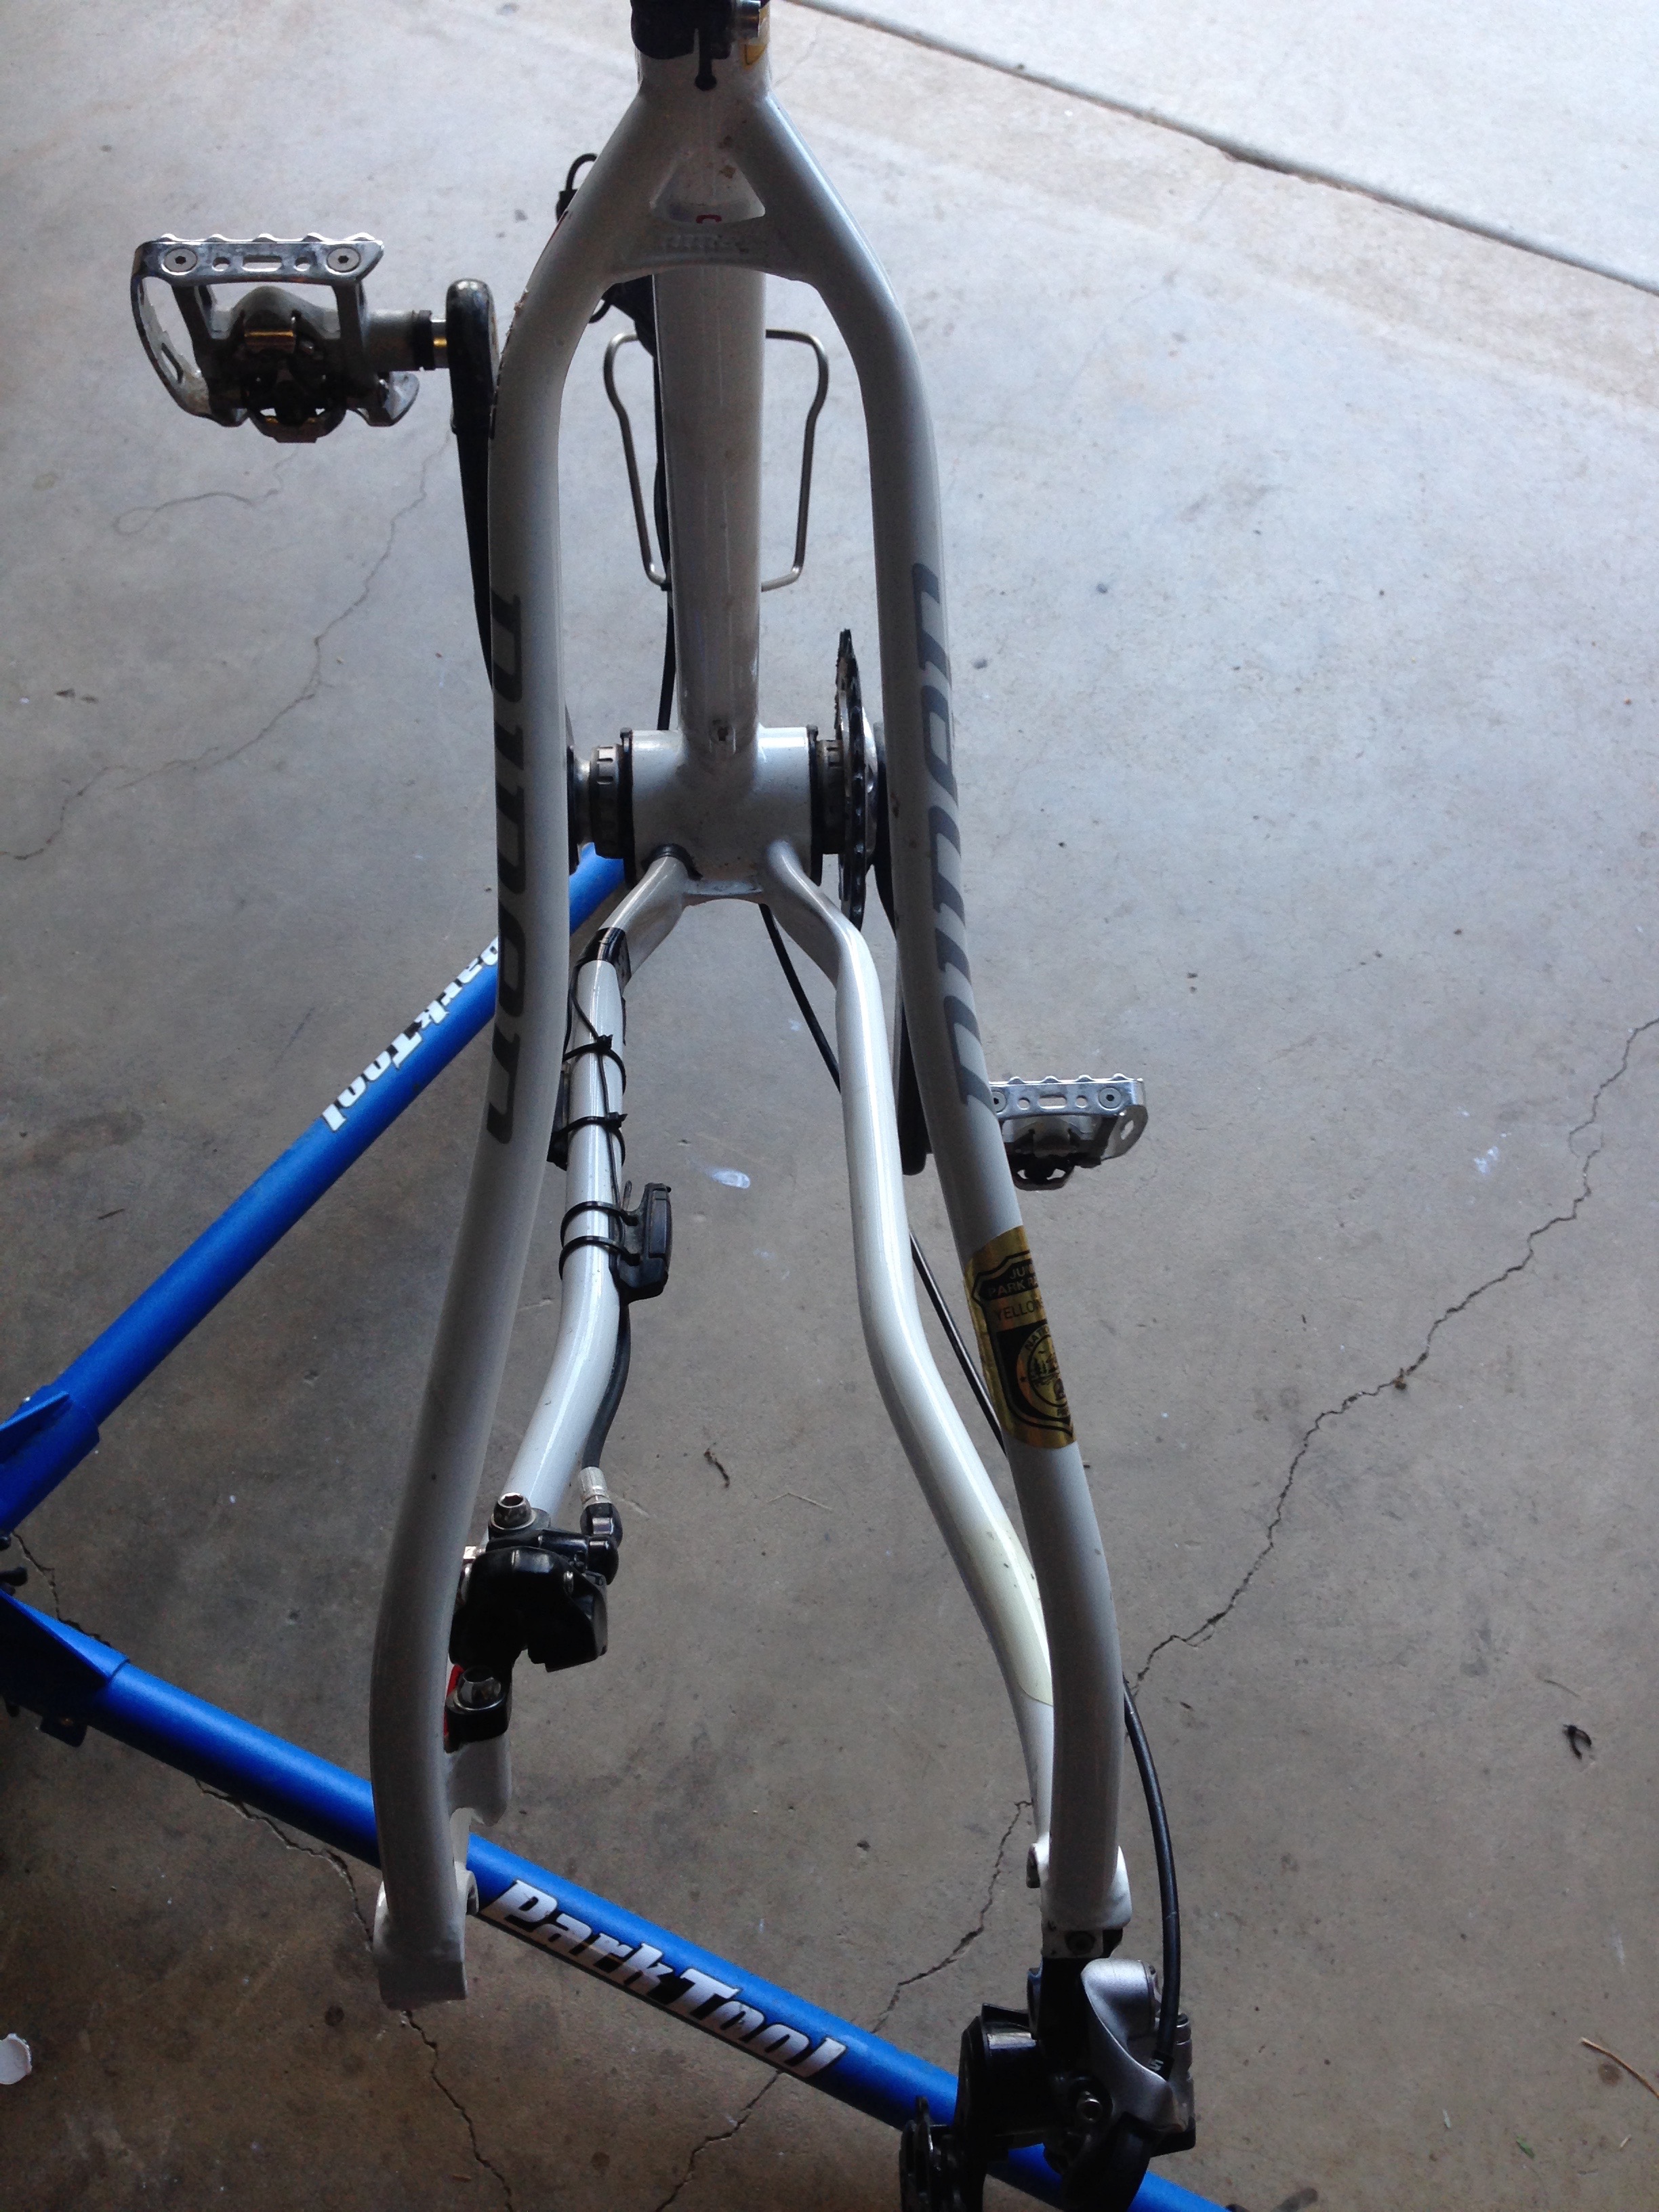
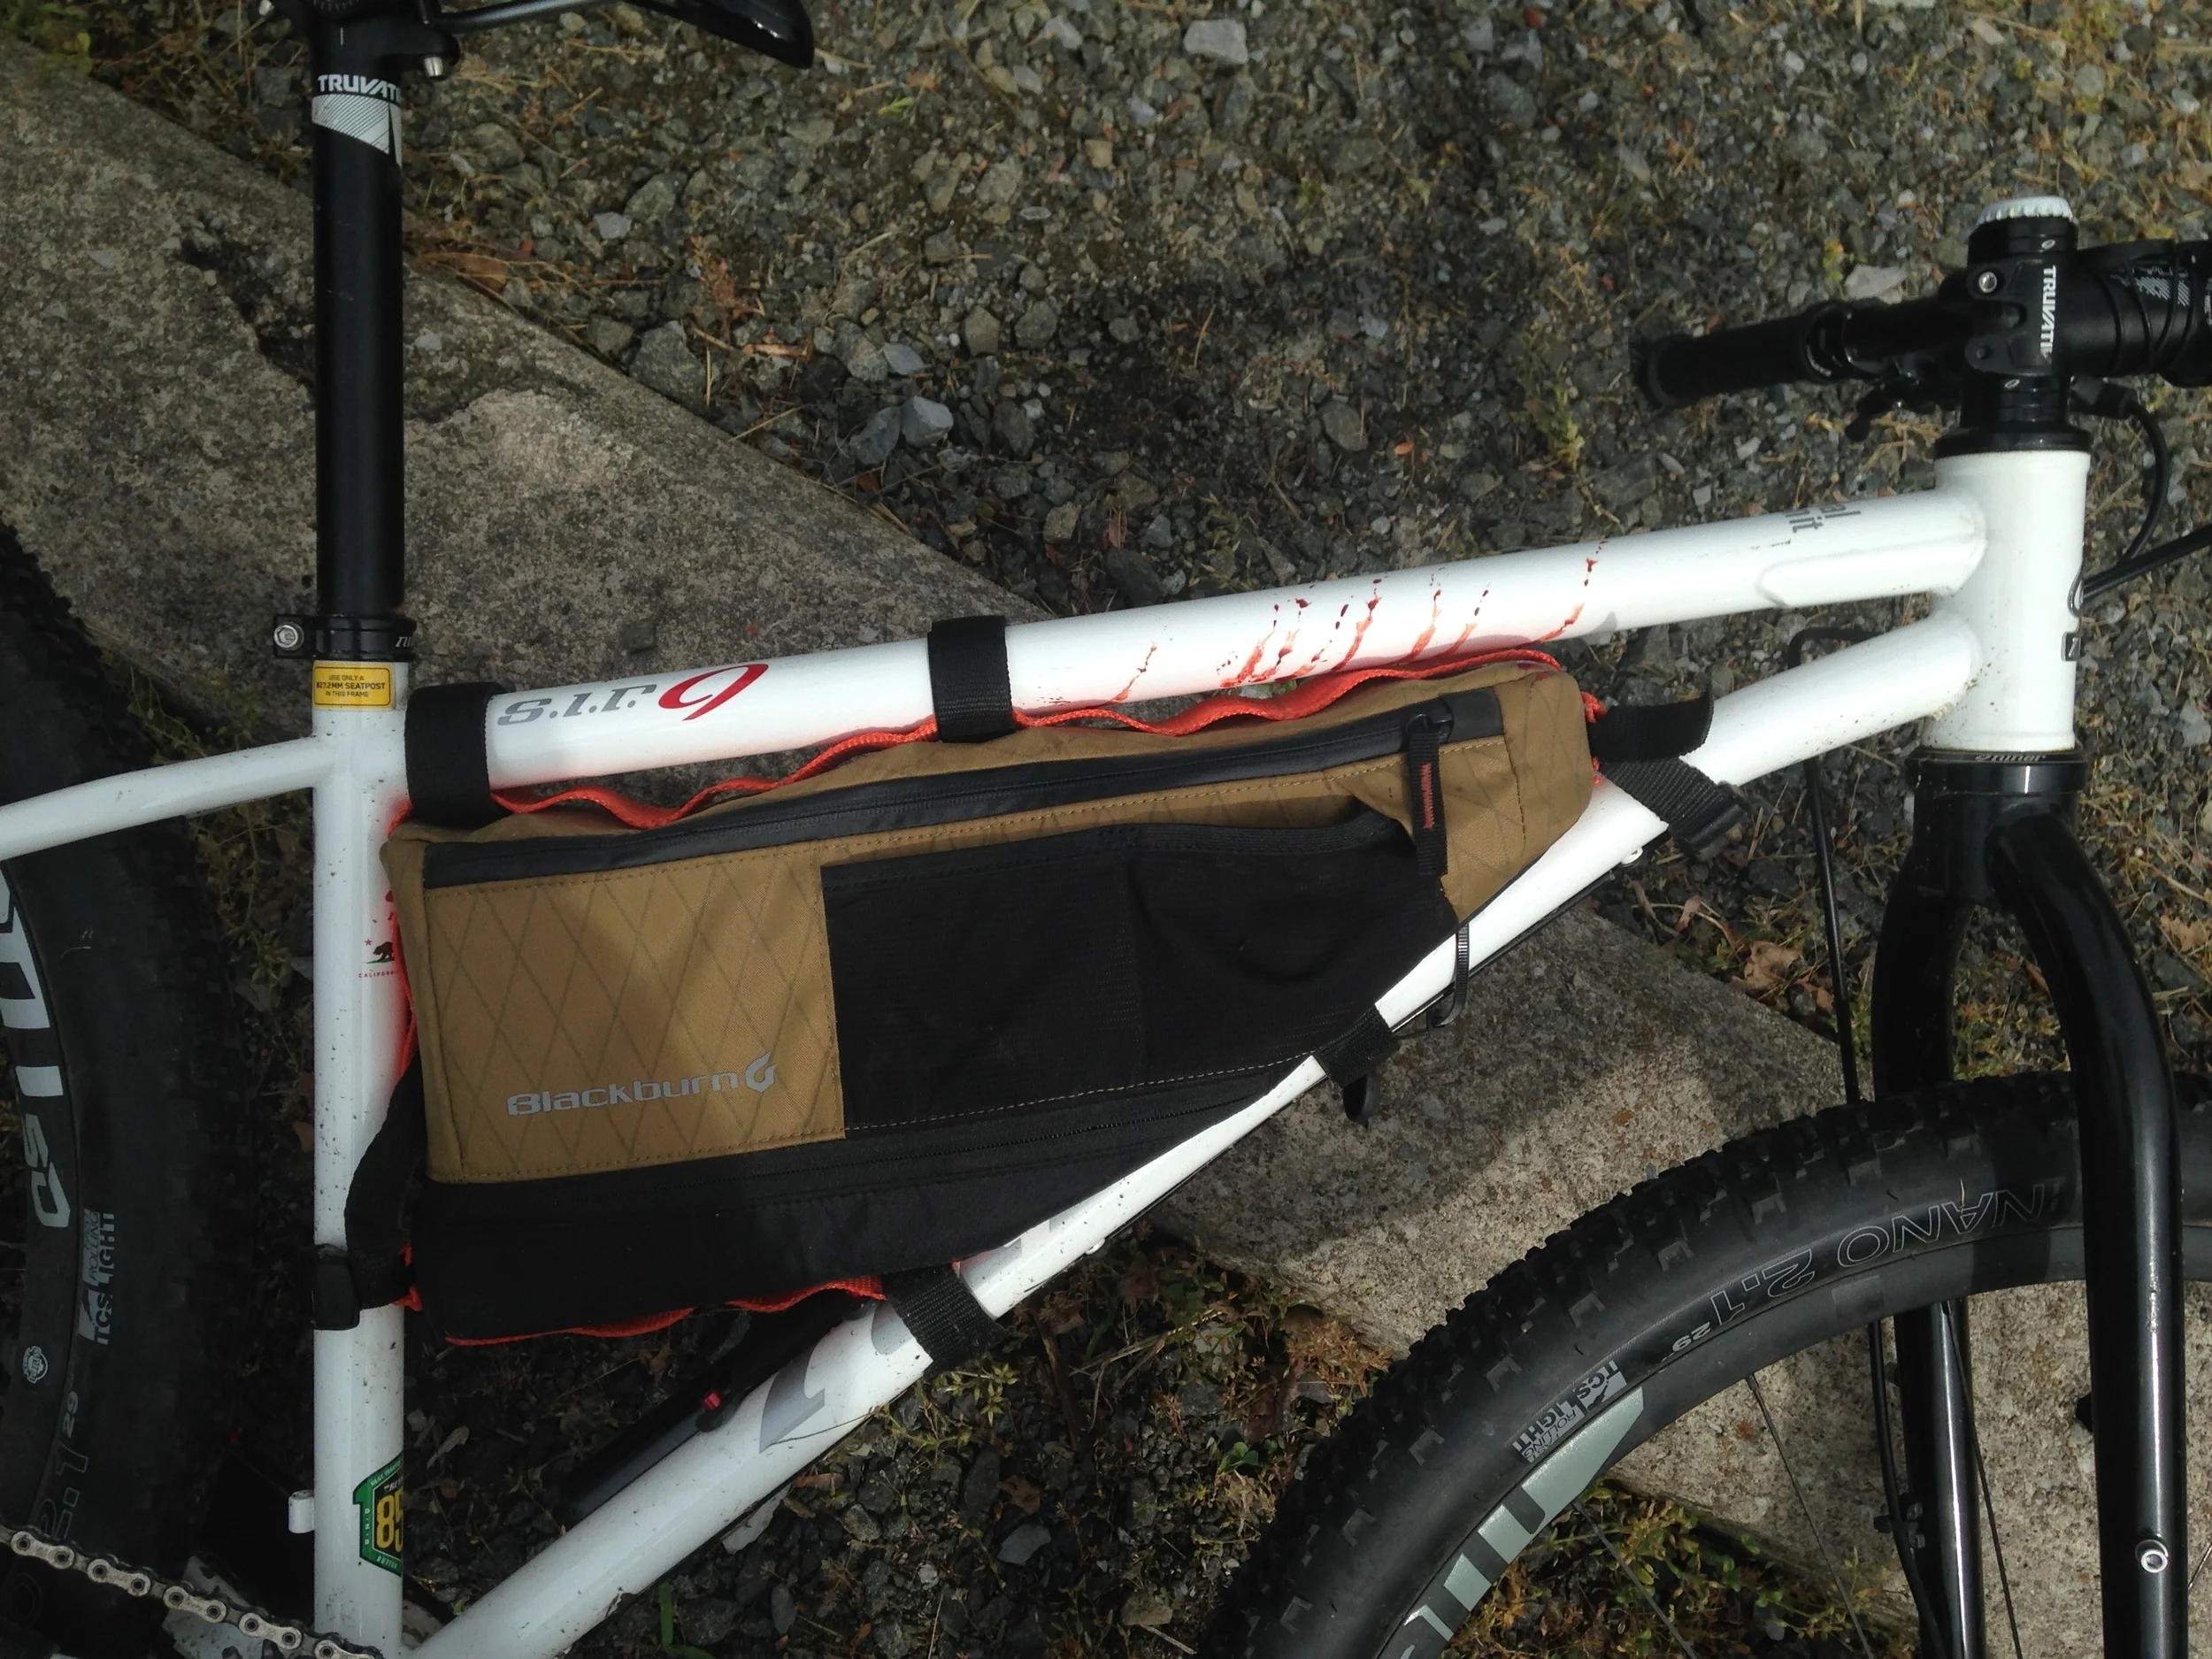
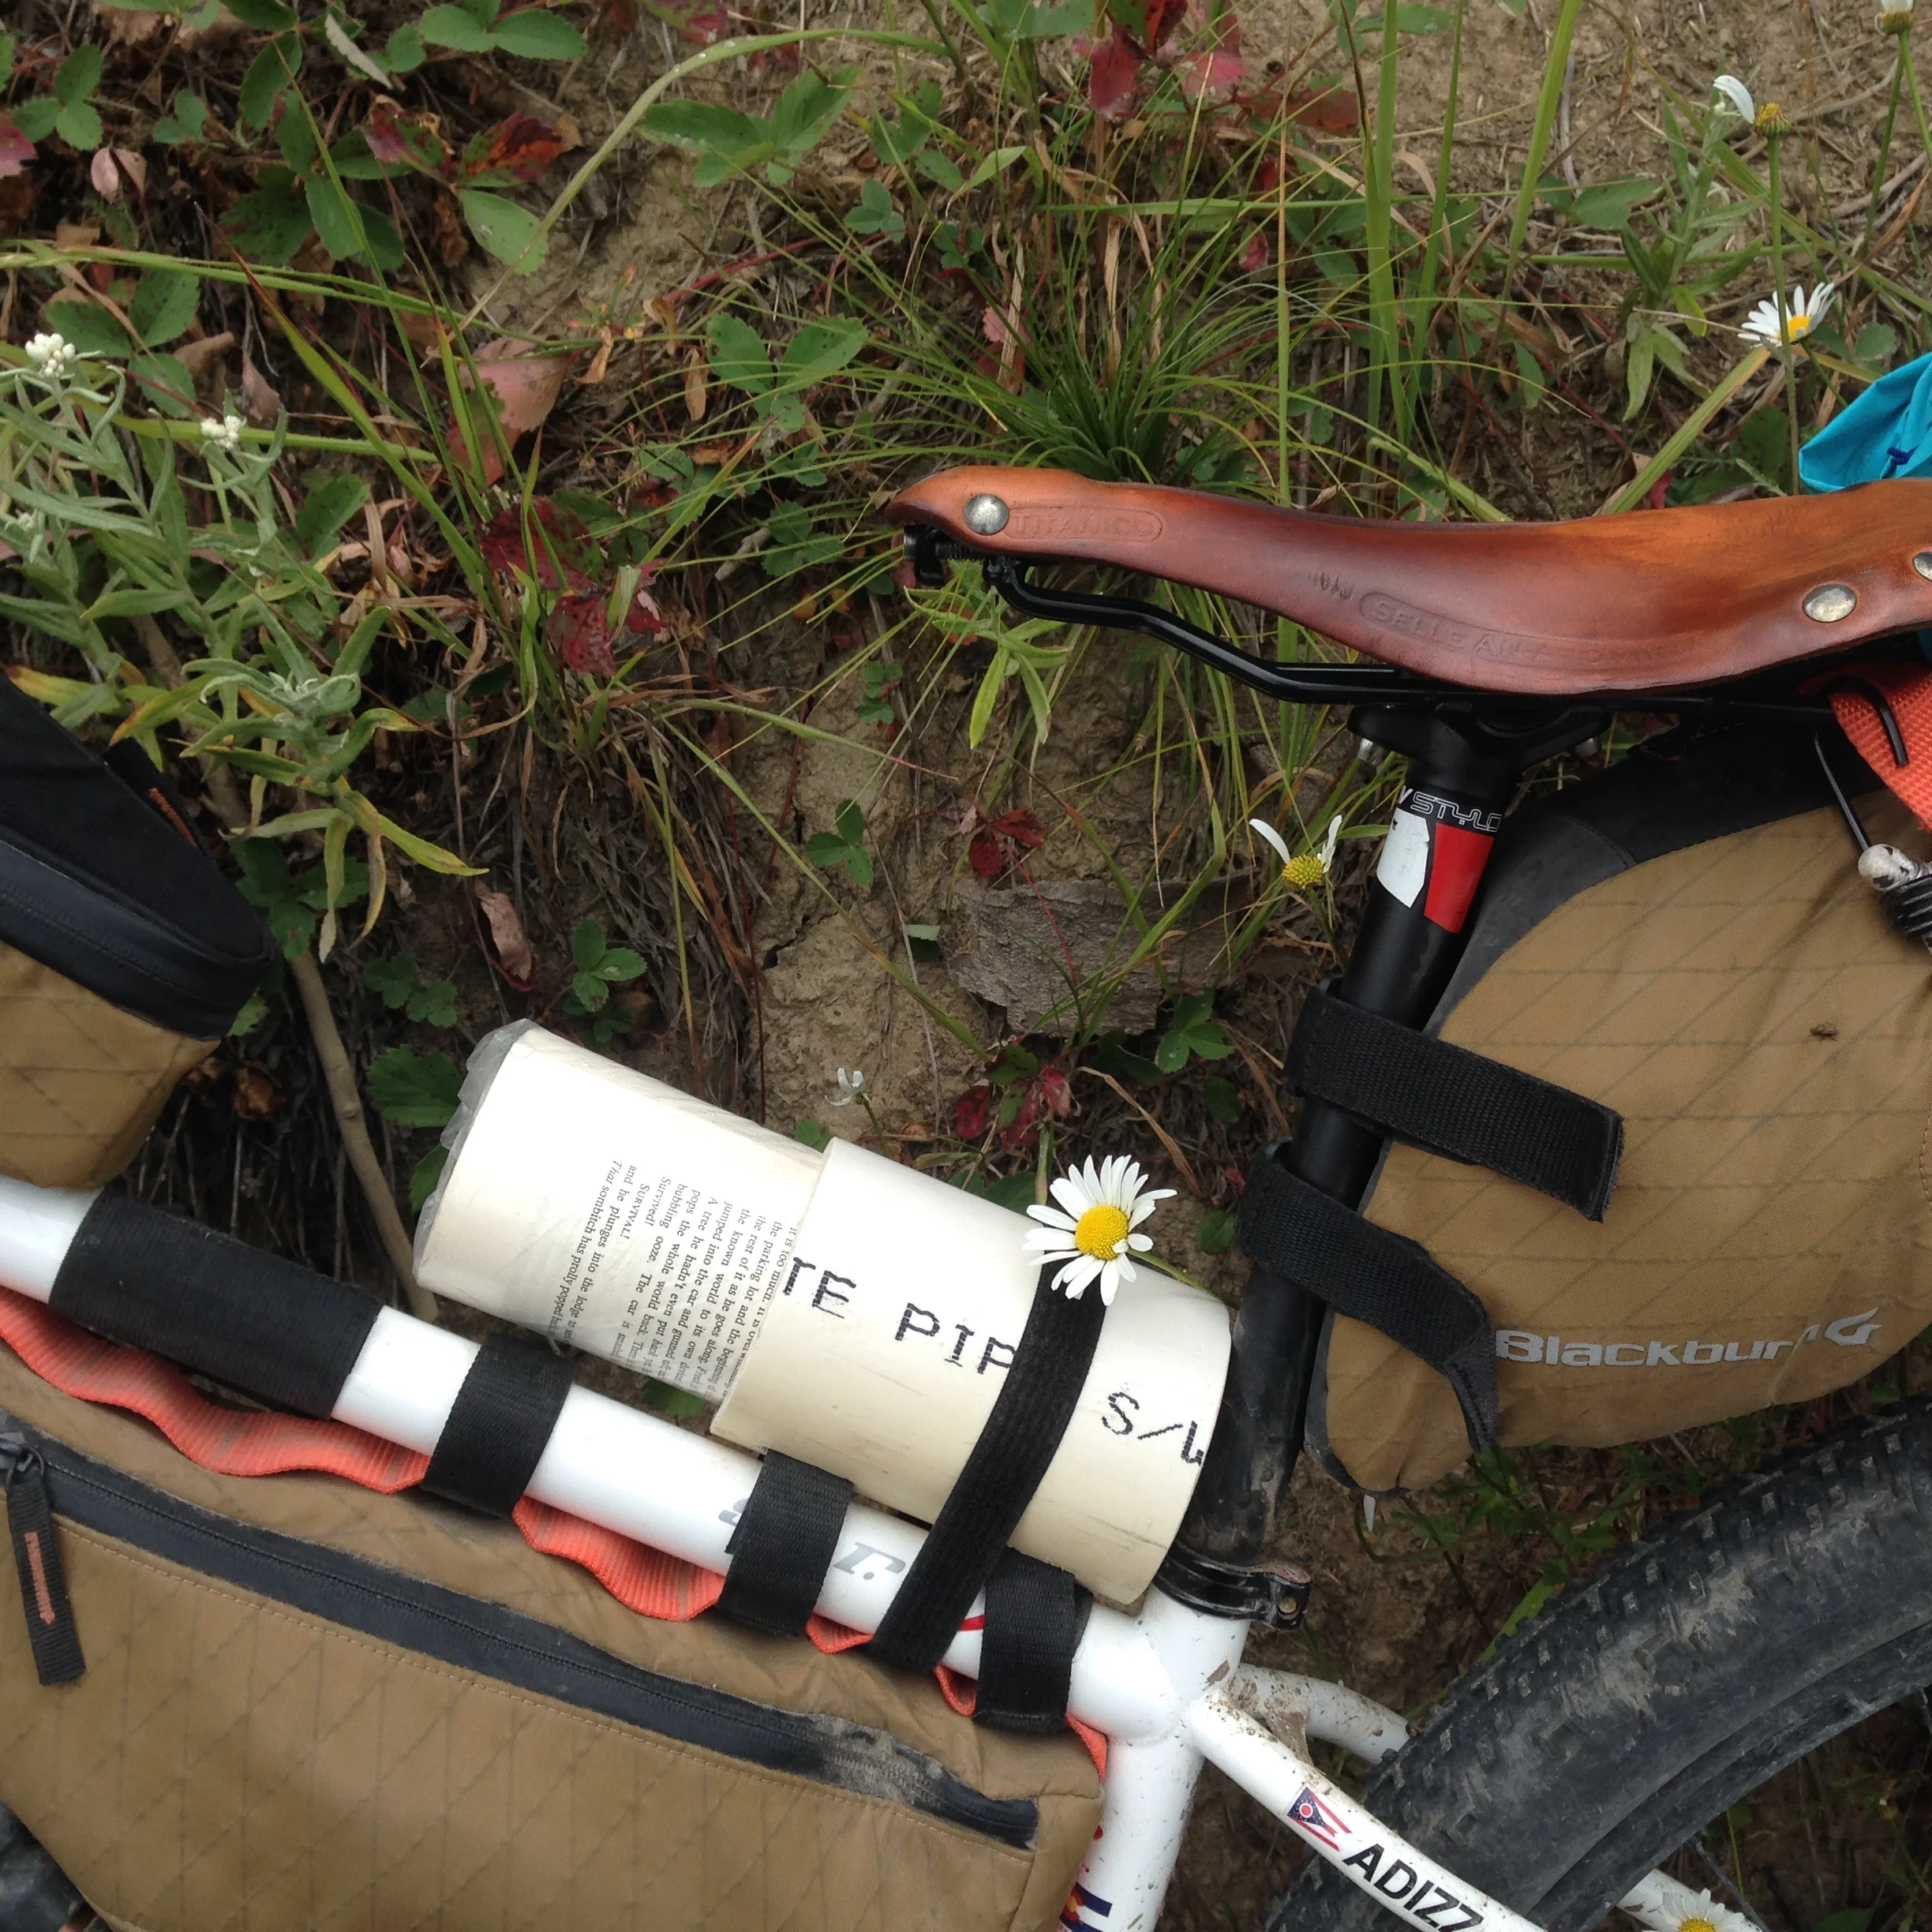
The frame itself is made from Reynolds 853, which is air-hardened, double zone butted steel. The result is a thin-walled, dent and impact resistant, lighter-than-your-city-beater frame. It was a comfortable ride, I wasn't worried about loading it down with gear, and know that this frame will basically last forever. Do what you want, but I personally wouldn’t feel comfortable riding a carbon bike down the Divide. The only downside was that the geometry is a little less than ideal for long-haul bikepacking as the geometry still stays pretty true to mountain biking form. The main triangle is a bit on the small side, which means a frame bag is also going to be smaller. I was wishing I had more space there to put water and food. I did my best to make up for it by adding my super low budget, DIY book holder on top of the top tube. (See pict.)

Groupset/Drivetrain
SRAM XX1 SRAM XG-1199 X-Dome (1 x 11) 32T front chainring, 10-42T casette, 170mm cranks, X-Actuation Trigger Shifter
What Worked: Having only one chainring up front (30 teeth), and 42 teeth in the lowest gear in the back
What Didn't Work: Backpedaling when the chain is in the lowest gear (biggest cog) on the cassette
Would use again.
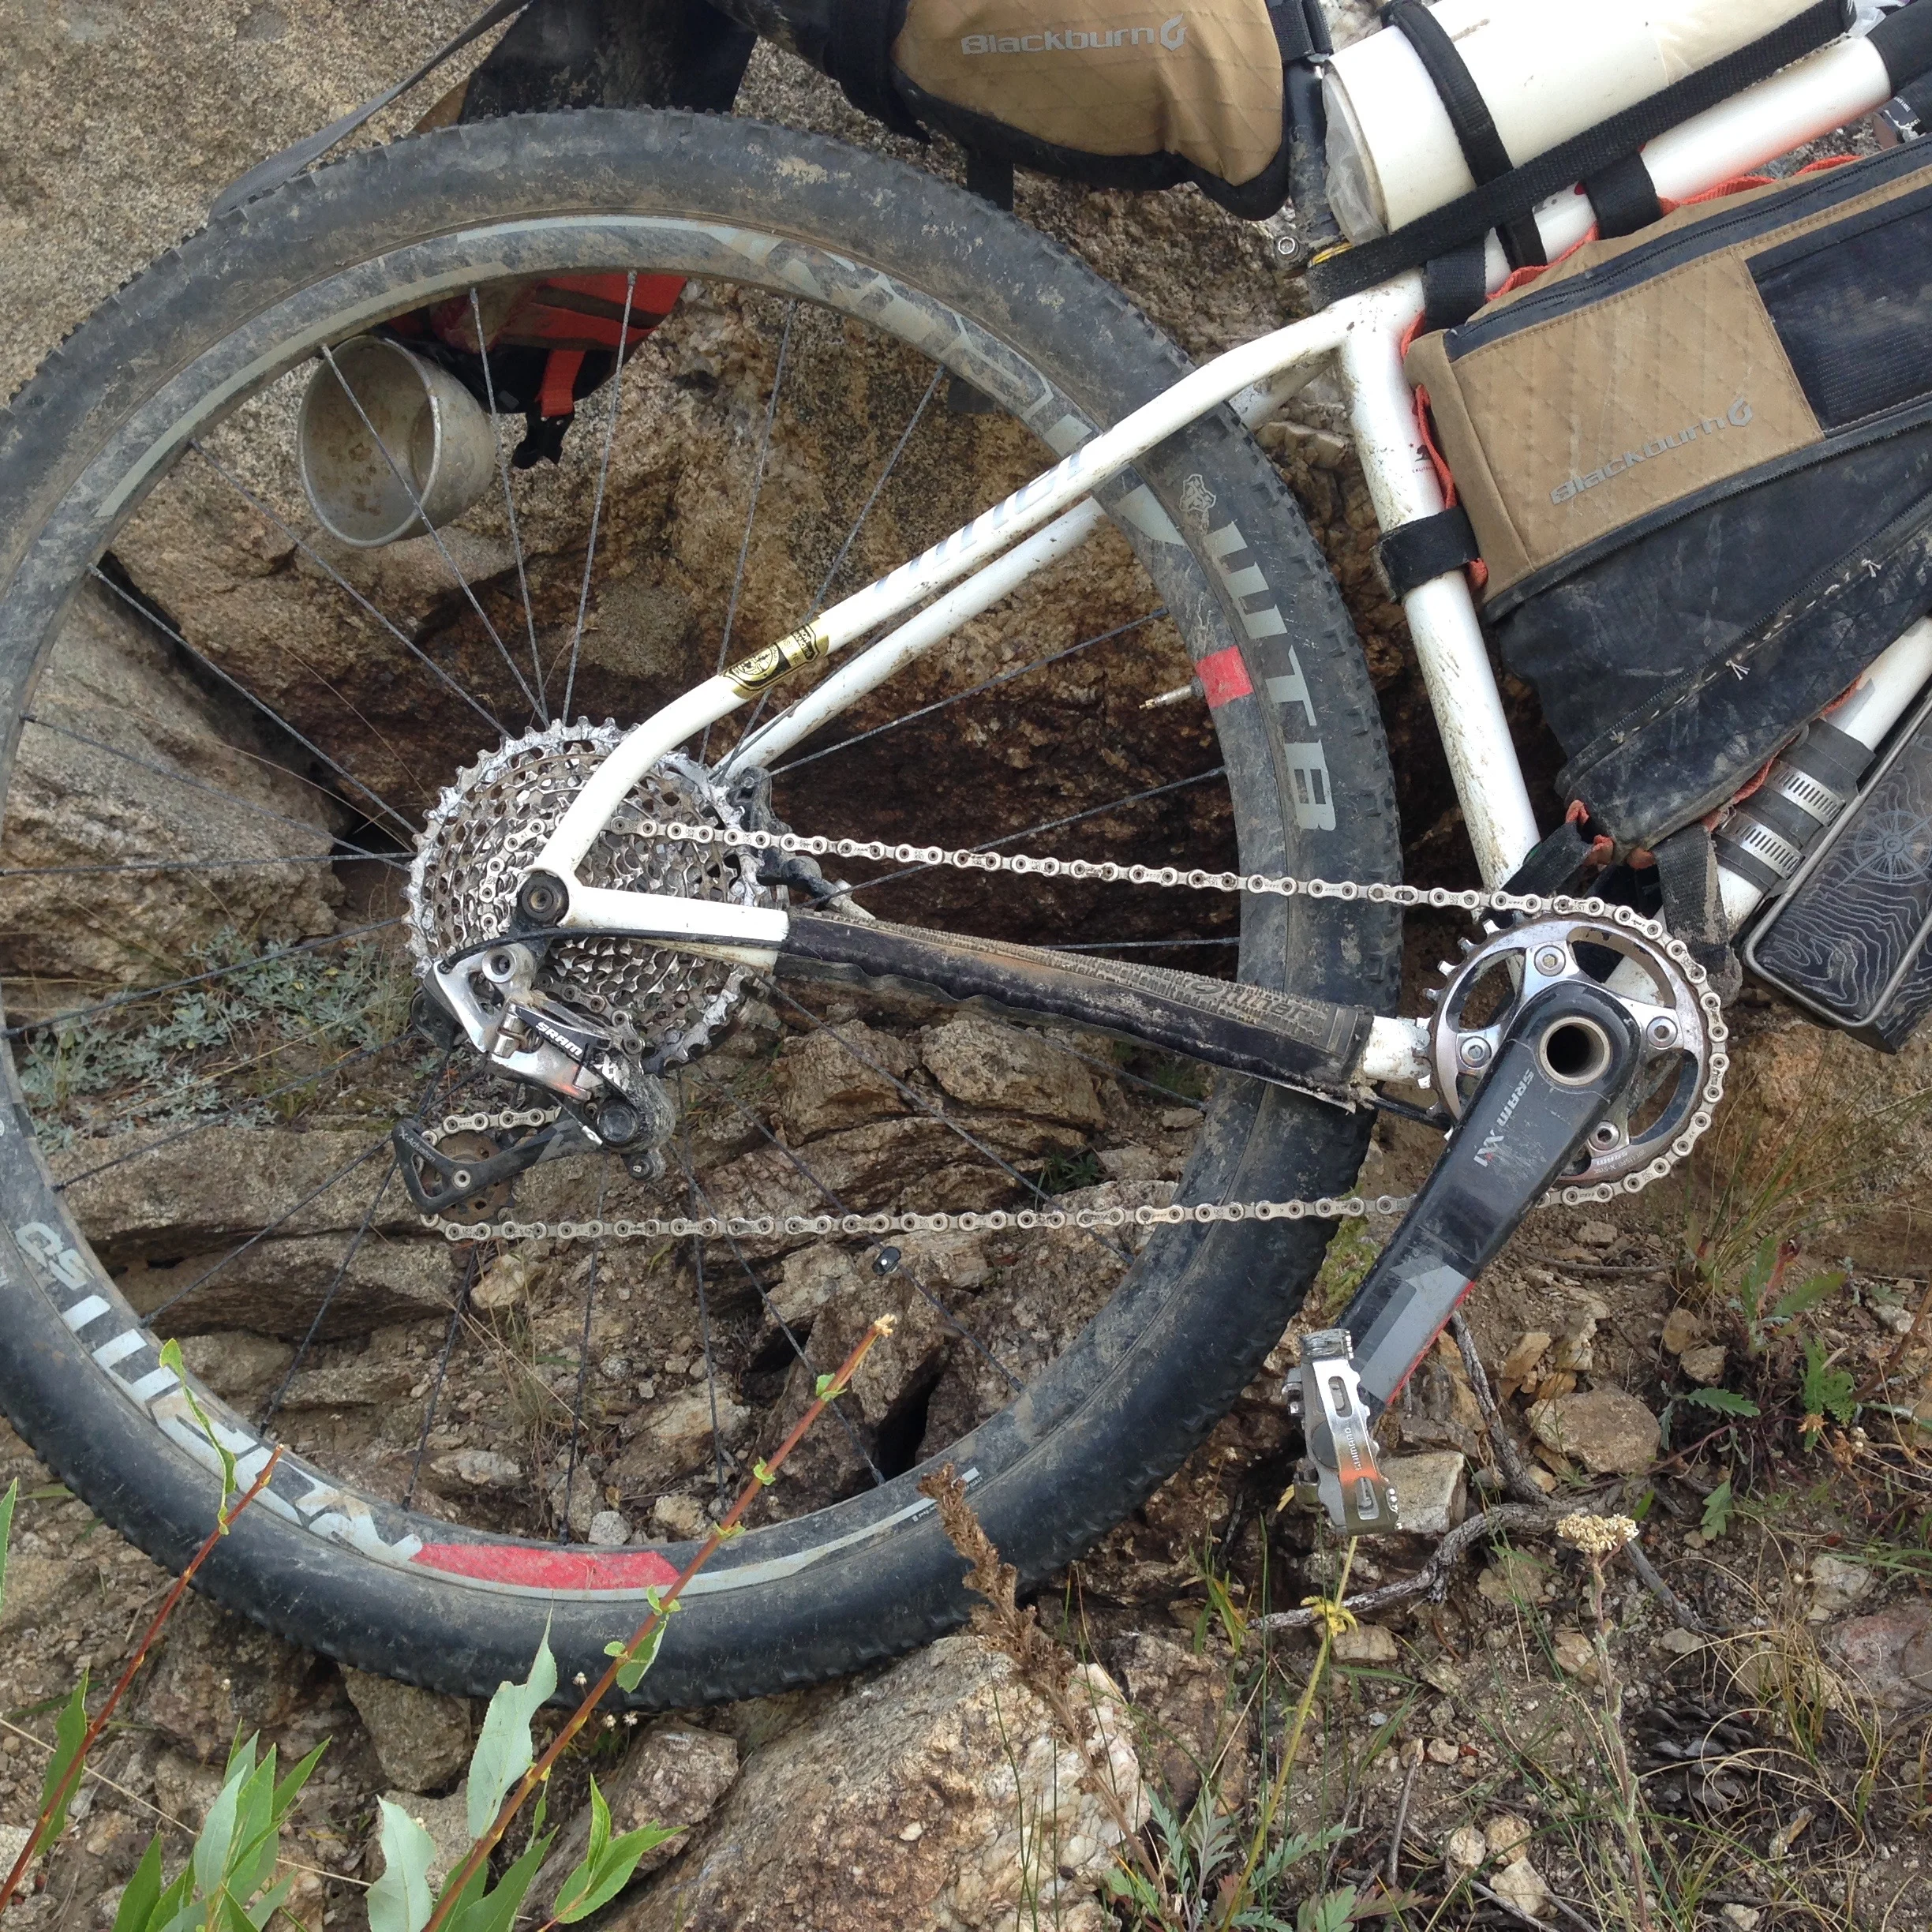
The 1 x 11 setup is really awesome for touring. Not having to deal with a front derailleur is fantastic. It's one less part to break, gum up with with mud, need adjustments - in general - one less thing to cause trail-side stress. I ran a 30 tooth front chainring with a 10-42 tooth, 11-speed cassette. This setup worked perfectly for even the steepest GDMBR climbs. I was never wanting for another gear on the hills. On the flats and descents, I would spin out around 22 mph. I felt that this was pretty rare (maybe 5% of the whole trip?), and it's not a bad idea to coast sometimes. :) The only problem I consistently had with the 1 x 11 was that after the chain got some wear and tear, I couldn't backpedal very far in the lowest gear without the chain falling down to the next cog. Most bike mechanics will say that this is fairly common an unavoidable as you're essentially cross-chaining when the chain is in the lowest gear. The teeth on the cassette are specially designed to keep the chain on the cogs, but only when pedaling forward. What this boils down to is just some annoying clicking and maybe a shift when getting back on your rig during a big climb. Definitely not something for which I'd ditch the 1 x 11 setup. Shifting was perfect; no complaints there.
SRAM XX1: Crusher of hills, conqueror of the GDMBR
Brakes
SRAM Guide RCS
What Worked: Everything
What Didn't Work: Nothing
Would use again.
I'm not going to pretend to be a brakes expert. I'll just tell you what I know. I never had a problem with my brakes. They were a bit touchy in the beginning (brand new), and less so at the end of 3,000 miles. Expected that. I didn't bleed them at any point, but I probably will soon for fun. It was easy to adjust the contacts with the dial on the lever (without tools). As a friend pointed out, they have a decent sized screw to keep the lever in place so there's no up/down wiggle... for whatever that's worth. I never had to do trail-side repairs, so I can't comment on that. But it's probably worth noting that I didn't have to trail-side repairs in about 3,000 miles. SRAM brake haters, stop being a closed-minded curmudgeon and give them a second thought. SRAM started from scratch on this braking system, and as far as I can tell, the technology works. The brakes have a timing port mechanism such that air bubbles are directed through the port into the reservoir, effectively self-bleeding the brake. If you want to read more about how they work, go to the Bike Mag's review. If you want a more professional, long-term review, check out this one by BikeRadar.
Tires/Wheels
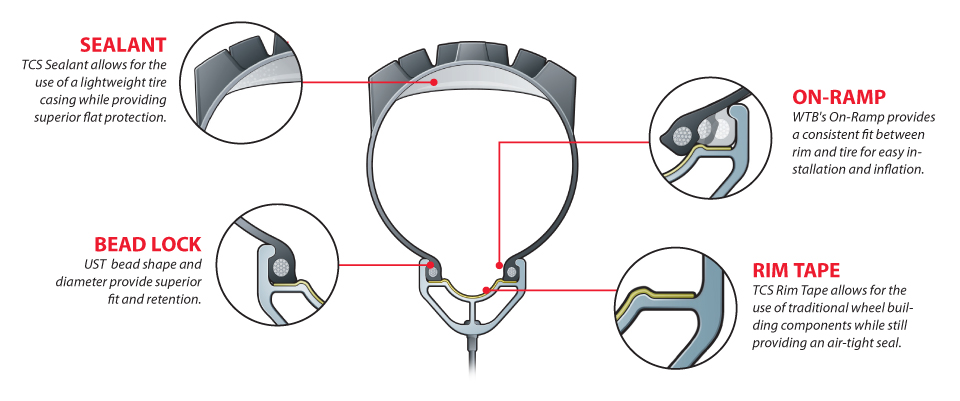
WTB Nano 2.1 TCS, SRAM Roam 50 (rear) and Stan's Arch EX (front)
What Worked: The Center Bead and running tubeless
What Didn't Work: Supple/thin sidewalls
Warning: WTB Nano 2.1 do NOT work well with Stan's rims... read more below
I have pretty much no complaints at all about the WTB tire. It's an excellent choice for the GDMBR. It has a center bead that allows for a low rolling resistance while on the less technical roads and enough side tread to grip when you're turning through technical sections. It is extremely wear resistant. I had a puncture or two, but they were all sealed with the Stan's sealant in no time. However, I have had two sidewall gashes with these tires. Once while I was still in Philly (read: glass everywhere) and once about 300 miles from the end in New Mexico. I don't know what the cause of the second gash was, but I did end up throwing a tube in the tire. I'd say that the WTB Nano is a great tire for the divide, but you don't want to take this tire to shred singletrack, and be sure you have a spare tube.
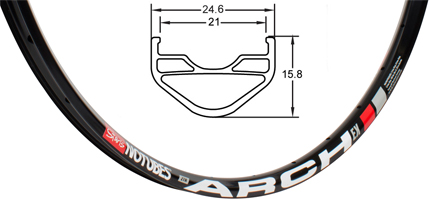
Warning: I built a generator hub, which involved building a new wheel. I didn't realize it at the time, but the Stan's Arch EX rim I picked out is somewhat incompatible with the WTB tires. Far as I can tell, you could probably get them on with a lot of time and patience, but you'd have a hell of a (bad) time doing it. The TCS tires are constructed with a bead specifically designed for tubeless application. The Stan's rims are designed to make almost any tire tubless, which includes also includes a lip edge to keep tires sealed tight. The two designs make it near impossible to apply and remove the tire. Even Stan's formally doesn't recommend using this tire with their rim. So I ended up putting a WTB XC tire on the front. This wore down faster than the Nano, and I actually ended up doing a quick replacement with a Scwalbe Racing Ralph for the state of Wyoming (or about 400 miles). The Racing Ralph was sketchy as it leaked Stan's through the sidewalls. I replaced that tire again with the WTB XC in Colorado, and made it to the border without a problem.
Saddle
Selle Anatomica X Series
What Worked: The Shape, Material (leather saddle with a cutout)
What Didn't Work: Hex Key Tensioning System (needed some teflon tape)
Would consider a Brooks next time.
Saddles are a personal choice thing. I typically do well with saddles that have a cutout in the middle as it supports my sit bones, and takes all the pressure off the perineal area and other sensitive bits. The leather is great too as it's strong but supple (for dat washboard) and conforms to your anatomy. Every long-distance rider (read: longer than the Divide) I met was riding a leather saddle (usually Brooks) and usually without a bike chamois. I DID wear a chamois; two pair, one thin and one thick. A draw back was that theres a simple hex key tensioning system, but it would often screw in after a day of washboard, effectively loosening the tension of the saddle. Additionally, the nose stuck out and up, which made it difficult to mount and dismount the bike. The hex key could be steadied with some tape on the threads or another of the many methods of keeping screws from coming loose.

Pedals
Shimano PD-M324 SPD Dual Platform Pedal
What Worked: The 'dual' part of the "dual platform"
What Didn't Work: Riding the platform part of the pedal with clipless shoes
Would consider just platform pedals next time.
What didn't work sounds obvious, I know. However, my clipless shoes had a somewhat recessed cleat, and it actually worked with the platform for about 1,000 miles. However, as the trip went on, the grips on my shoes wore down, and my foot began to slip off the platform while not clipped in. I switched to dual platform pedals after I aggrivated my knee in the first week of riding. Riding without clipping in is definitely the safest way to ride long distance if you have both a solid platform pedal and shoes that will grip it. This allows your leg/foot to move wherever it wants to naturally, and you run less of a chance of injuring yourself. When you're clipped in, your leg is in a somewhat fixed position (I don't care how much float your pedal has), and you're more prone to injury. I found that being able to be clipped in on the downhills and unclipped for everything else worked well to keep me locked in when I needed control and keep things relaxed for the working sessions.
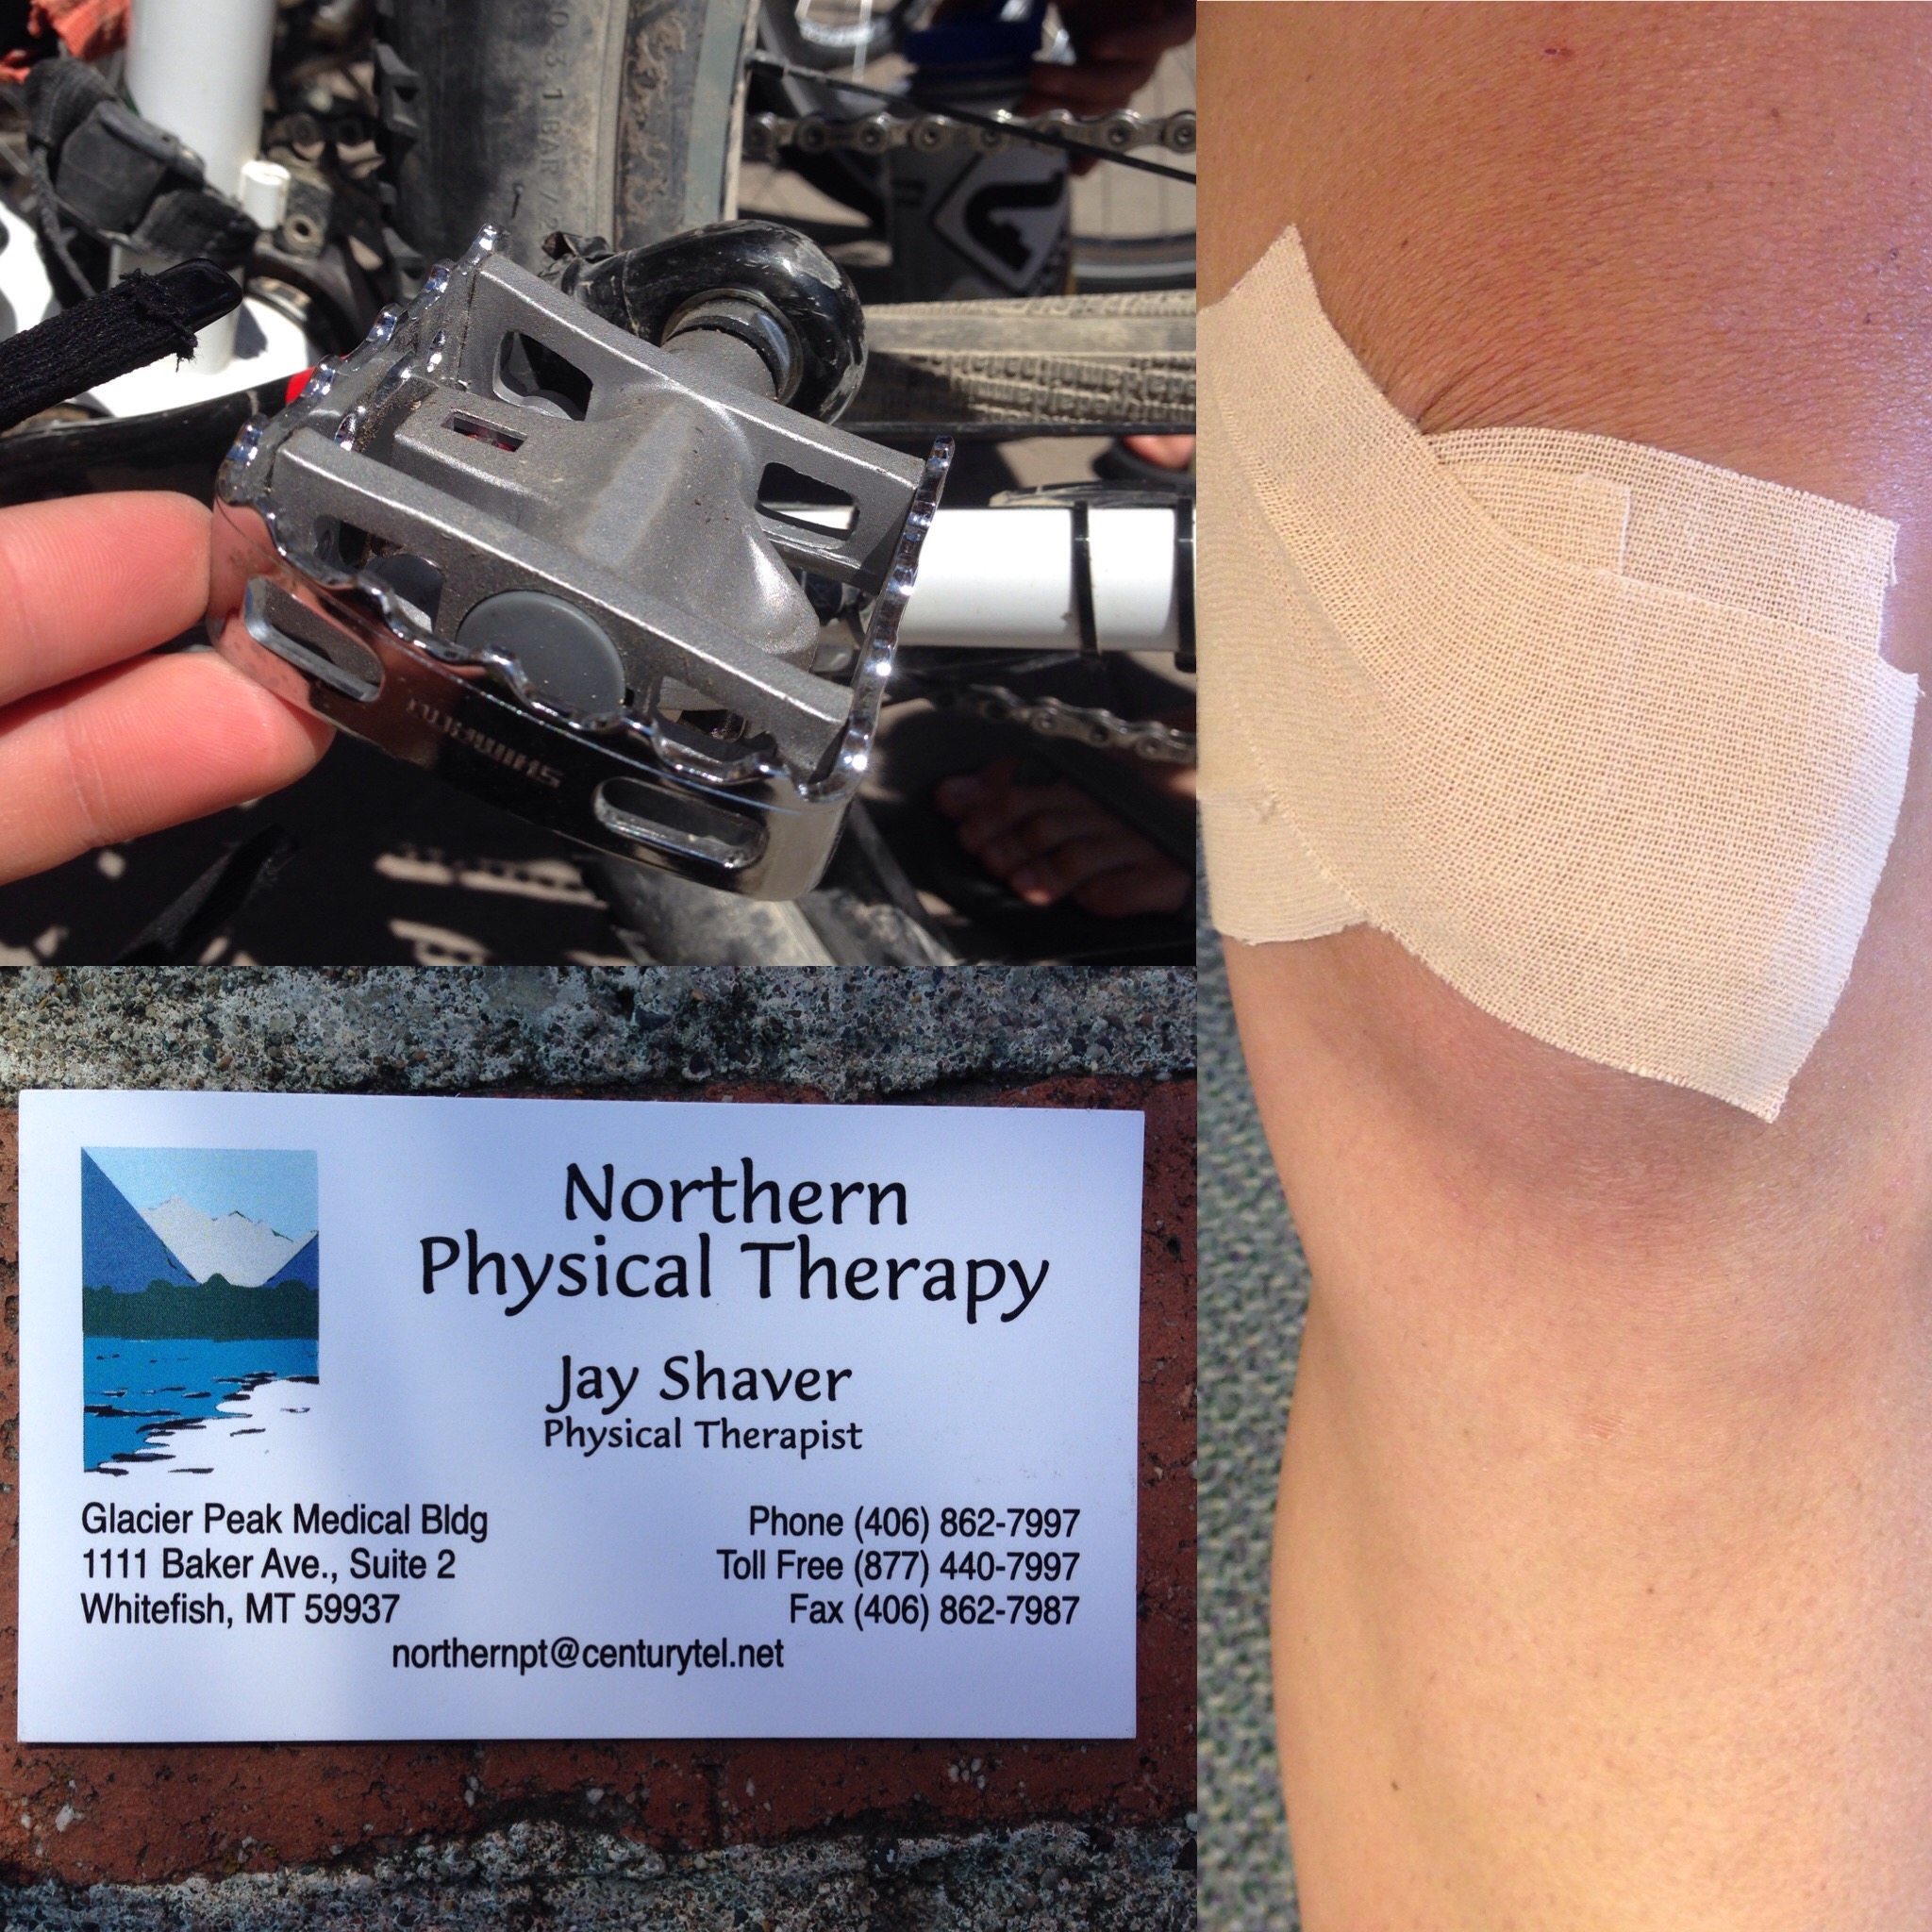
Between a dual platform pedal and a great PT session, I was able to help my overused knee.
Handlebar
TRUVATIV Stylo T40 Riser Bar
What Worked: Meh
What Didn't Work: The riser bar with aero bars
Would switch to a no-rise handlebar next time.
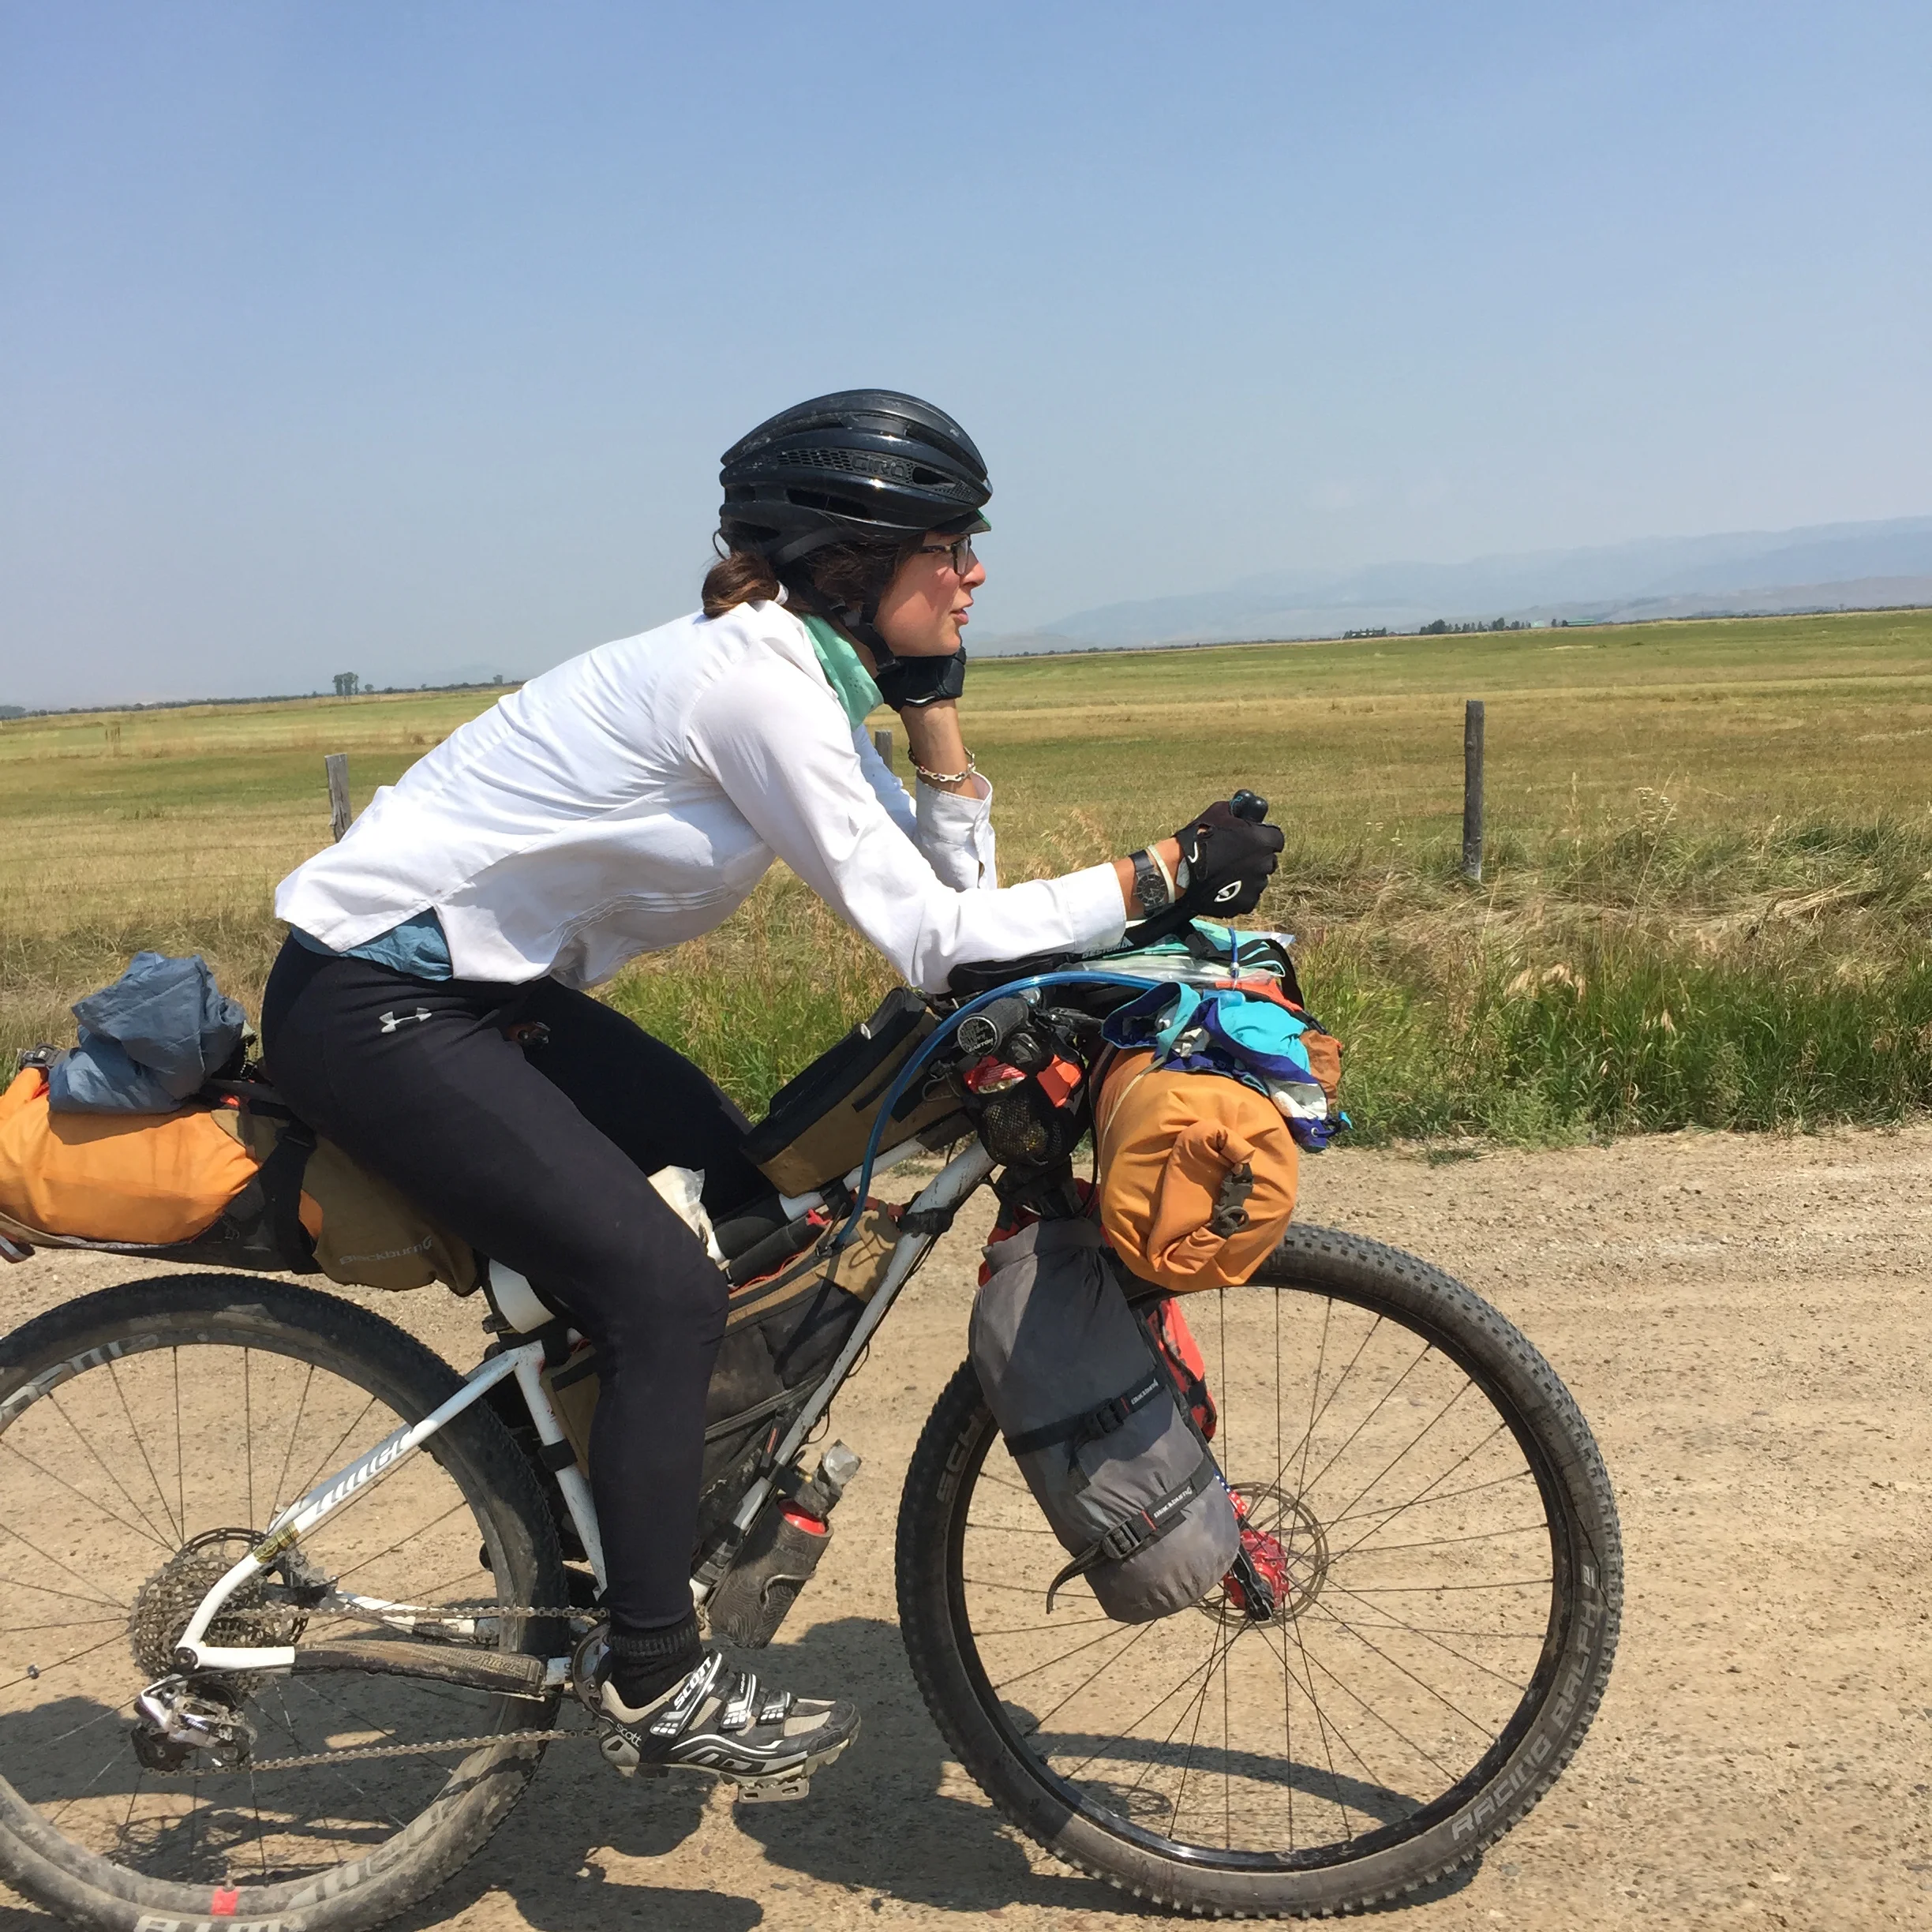
Not much to say here except that if you're going to put aero bars on your bikepacking rig, think twice before getting a riser bar. I didn't really have a choice, and didn't plan in advance enough to switch out the handlebar before I started. The "riser" part of Riser Bar meant that there was an awkward change in shape and diameter of the handlebar when I went to mount aero bars on either side of my stem. The aero bars were never really tight enough as there was always a gap in contact, and one bar was forever pointed a little to the right.... SO uncool.

You can sort of see the way the aerobars are mounted here, and how they aren't parallel.
Aerobars
Profile Design T1+
What Worked: The length and 3-d pad adjustment
What Didn't Work: Mounting to a riser bar
Would use with a no-rise handlebar next time.
Everyone asked me if I was happy with aerobars. My reply was always that I didn't use them very frequently, but when I did use them, I was VERY grateful for them. Aerobars are great for those long, flat sections, even when there's washboard gravel road. I found that the aero position actually dampened some of the washboard jarring effect if I could keep the bike under control. Aerobars are great for the sections of road where there always seems to be a headwind. They're great for giving your hands/wrists a break from your handlebars. However, there are a million ways to configure your setup, including drop handlebars or adding ergonomic bar ends to your traditional setup. Do your research, try it out, make mistakes, get messy!
Chillin in aero. Actually found myself doing this when I rolled into town and didn't know yet where I would eat first.